Saat akan menggunakan Mojo, saya melihat sekarang Mojo menggunakan Pixi untuk development setups bagi para software developer yang akan menggunakan Mojo. Secara natural saja saya kemudian penasaran dan ingin mencoba menggunakan Pixi serta membandingkan dengan berbagai tools yang pernah saya gunakan. Perbandingannya mungkin belakangan saja, saya tulis di sini langkah-langkah dokumentasi penggunaannya untuk memudahkan mencari referensi jika berikutnya saya memerlukan Pixi.
Instalasi Pixi mudah, hanya perlu menjalankan script yang diambil dari URL kemudian mengatur PATH. Hasil instalasi akan diberikan di direktori $HOME/.pixi dengan *binary executable diletakkan di direktori bin. Konfigurasi PATH tentu saja disesuaikan dengan shell yang digunakan. Untuk fish shell saya, kurang lebih akan seperti ini:

Setelah mengatur PATH, Pixi bisa dijalankan:
$ pixi
Pixi [version 0.49.0] - Developer Workflow and Environment Management for Multi-Platform, Language-Agnostic Workspaces.

Pixi is a versatile developer workflow tool designed to streamline the management of your workspace's dependencies, tasks, and environments.
Built on top of the Conda ecosystem, Pixi offers seamless integration with the PyPI ecosystem.

Basic Usage:
    Initialize pixi for a workspace:
    $ pixi init
    $ pixi add python numpy pytest

    Run a task:
    $ pixi task add test 'pytest -s'
    $ pixi run test

Found a Bug or Have a Feature Request?
Open an issue at: https://github.com/prefix-dev/pixi/issues

Need Help?
Ask a question on the Prefix Discord server: https://discord.gg/kKV8ZxyzY4

For more information, see the documentation at: https://pixi.sh

Usage: pixi [OPTIONS] <COMMAND>

Commands:
  add          Adds dependencies to the workspace [aliases: a]
  auth         Login to prefix.dev or anaconda.org servers to access private channels
  build        Workspace configuration
  clean        Cleanup the environments
  completion   Generates a completion script for a shell
  config       Configuration management
  exec         Run a command and install it in a temporary environment [aliases: x]
  global       Subcommand for global package management actions [aliases: g]
  info         Information about the system, workspace and environments for the current machine
  init         Creates a new workspace
  install      Install an environment, both updating the lockfile and installing the environment [aliases: i]
  list         List workspace's packages [aliases: ls]
  lock         Solve environment and update the lock file without installing the environments
  reinstall    Re-install an environment, both updating the lockfile and re-installing the environment
  remove       Removes dependencies from the workspace [aliases: rm]
  run          Runs task in the pixi environment [aliases: r]
  search       Search a conda package
  self-update  Update pixi to the latest version or a specific version
  shell        Start a shell in a pixi environment, run `exit` to leave the shell [aliases: s]
  shell-hook   Print the pixi environment activation script
  task         Interact with tasks in the workspace
  tree         Show a tree of workspace dependencies [aliases: t]
  update       The `update` command checks if there are newer versions of the dependencies and updates the `pixi.lock` file and environments accordingly
  upgrade      Checks if there are newer versions of the dependencies and upgrades them in the lockfile and manifest file
  upload       Upload a conda package
  workspace    Modify the workspace configuration file through the command line
  help         Print this message or the help of the given subcommand(s)

Options:
  -V, --version  Print version

Global Options:
  -h, --help           Display help information
  -v, --verbose...     Increase logging verbosity (-v for warnings, -vv for info, -vvv for debug, -vvvv for trace)
  -q, --quiet...       Decrease logging verbosity (quiet mode)
      --color <COLOR>  Whether the log needs to be colored [env: PIXI_COLOR=] [default: auto] [possible values: always, never, auto]
      --no-progress    Hide all progress bars, always turned on if stderr is not a terminal [env: PIXI_NO_PROGRESS=]
$
Kita akan mencoba Pixi untuk Mojo. Bagian ini saya ambilkan dari Mojo - Getting Started. Mulai dengan membuat direktori untuk kode sumber:
$ pixi init life -c https://conda.modular.com/max-nightly/ -c conda-forge
✔ Created /home/bpdp/kerjaan/src/mojo/life/pixi.toml
$ cd life/
Setelah itu tambahkan paket modular:
$ pixi add modular
✔ Added modular >=25.5.0.dev2025072105,<26
$
Hasilnya kurang lebih seperti ini:
$ ls -la
total 152
drwxr-xr-x 3 bpdp bpdp     93 Jul 22 14:12 ./
drwxr-xr-x 3 bpdp bpdp     18 Jul 22 14:12 ../
-rw-r--r-- 1 bpdp bpdp    122 Jul 22 14:12 .gitattributes
-rw-r--r-- 1 bpdp bpdp     26 Jul 22 14:12 .gitignore
drwxr-xr-x 3 bpdp bpdp     63 Jul 22 14:12 .pixi/
-rw-r--r-- 1 bpdp bpdp 143123 Jul 22 14:12 pixi.lock
-rw-r--r-- 1 bpdp bpdp    266 Jul 22 14:12 pixi.toml
$
File pixi.toml digunakan untuk mengelola paket serta metadata dari proyek. Isinya kurang lebih seperti ini:
[workspace]
authors = ["Bambang Purnomosidi D. P. <phylossophie@gmail.com>"]
channels = ["https://conda.modular.com/max-nightly", "conda-forge"]
name = "life"
platforms = ["linux-64"]
version = "0.1.0"

[tasks]

[dependencies]
modular = ">=25.5.0.dev2025072105,<26"
Pada posisi ini, Mojo sudah terinstall dan bisa digunakan:
$ pixi run mojo --version
Mojo 25.5.0.dev2025072105 (068b9cc8)
$
Untuk mencoba, buat file life.mojo berikut ini:
# My first Mojo program!
def main():
    print("Hello, World!")
Untuk menggunakan Mojo secara langsung dari shell, gunakan perintah berikut:
$ pixi shell
Shell akan menampilkan tulisan environment yang aktif saat ini di sebelah kanan:
$ (life)
Untuk menjalankan:
$ mojo life.mojo                                                          (life)
Hello, World!
$
Untuk mengkompilasi menjadi binary executable:
$ mojo build life.mojo                                                   (life)
$ ls -la                                                                 (life)
total 176
drwxr-xr-x 3 bpdp bpdp    122 Jul 22 14:15 ./
drwxr-xr-x 3 bpdp bpdp     18 Jul 22 14:12 ../
-rw-r--r-- 1 bpdp bpdp    122 Jul 22 14:12 .gitattributes
-rw-r--r-- 1 bpdp bpdp     26 Jul 22 14:12 .gitignore
-rwxr-xr-x 1 bpdp bpdp  17688 Jul 22 14:15 life*
-rw-r--r-- 1 bpdp bpdp     64 Jul 22 14:15 life.mojo
drwxr-xr-x 3 bpdp bpdp     63 Jul 22 14:12 .pixi/
-rw-r--r-- 1 bpdp bpdp 143123 Jul 22 14:12 pixi.lock
-rw-r--r-- 1 bpdp bpdp    266 Jul 22 14:12 pixi.toml
$ ./life                                                                 (life)
Hello, World!
$
Jika ingin menggunakan REPL dari Mojo, gunakan perintah berikut:
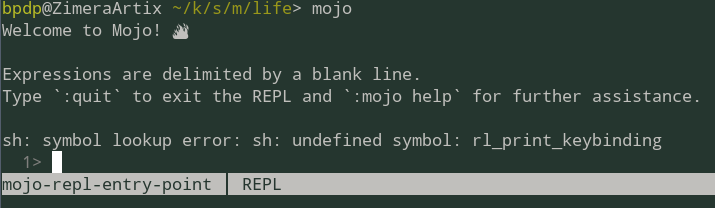
Catatan: abaikan sh: symbol lookup error: sh: undefined symbol: rl_print_keybinding karena spesifik untuk paket di distro Linux tertentu.

